10.06.2023
1
Beğenme
177
Görüntülenme
What Should Be Considered When Creating a Custom Dataset for Working with YOLO?
Based on my experience & experiment
When you want to train your own model using a custom dataset, you may have some questions about what to do, especially if you’ve just started working with YOLO. If you like to learn to swim by jumping into the water, I would like to talk about a few of my experiences that will open new doors for you.
Take it easy!
If you have decided to train a model, you have made a decision about some of the following:
- What’s my goal? (Classification, Object Detection, Instance Segmentation)
- Which Neural Network algorithm will I work with? (CNN algorithms, SSD, YOLO versions, etc.)
- What are the hyper-parameters of my model? (image size, batch size, weights, number of epochs, etc.)
In this part, it is very important to choose the appropriate algorithm for our goal. If we choose the right algorithm, we can deepen our knowledge of the model, and at the end of the day, we have a wealth of knowledge about it. Therefore, when starting a project, especially if you want to create your own model, it is useful to decide beforehand by examining which algorithms work more successfully for which purpose. For example, I decided to work with the YOLO algorithm for my object detection studies.
We will also talk about the hyper-parameters in the section on the factors affecting the success rate of the model we have trained, but for now, it is useful to know what the hyper-parameters are and why they are used.
If we have the answers to these questions, let’s start the warm-up laps!
Getting Started
You’ve probably checked out various tutorials before. What you noticed when working with any of the YOLO versions were the COCO dataset, weights, and configuration files.
COCO is a large-scale object detection, segmentation, and captioning dataset.
It is a dataset that has been trained on 330K images, of which more than 220K has been labeled, and allows you to classify with 80 object categories.
The YOLO weights used were obtained as a result of the training on this data set. When you want to train with your own dataset:
1. You can only export your custom dataset and use the weights of the COCO dataset.
2. You can create your own weights from scratch while training your custom dataset.
3. When training your custom dataset, you can get better results by using your weight results from previous training results.
In this section, if you are not creating your own weights from scratch, you are progressing your learning by transferring the previously learned weights, here we call it Transfer Learning.
So when should we choose to use our own weights and when to use YOLO’s weights? The answer to this question is what we want. If the type of object we want to work with is in the 80 classes of COCO, we can achieve good results in a short time with the weights of YOLO, for example, you can easily detect a toothbrush. You can find which objects are included in these 80 classes from data files such as coco.yaml or coco128.yaml (whichever your model is using). You can access these files by clicking the Ultralytics GitHub account link.
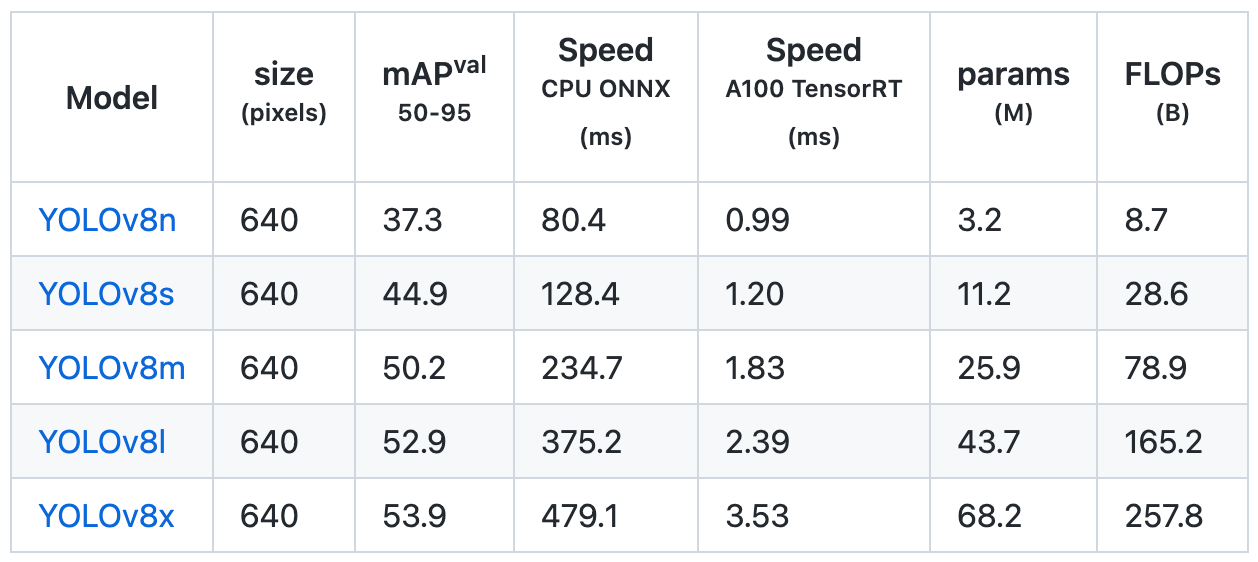
Note: You can choose the appropriate model according to the size of your custom dataset, such as YOLOv8s (small), YOLOv8m (medium), YOLOv8l (large), etc.

Another possibility is that the object you want to work on is not included in the COCO dataset or you want to create your own model. In this case, we are faced with our main question; “What Should Be Considered When Creating a Custom Dataset for Working with YOLO?”.
Ready for Take-off 🚀
We are now clear that we want to train with the custom dataset. The characteristics of the custom dataset significantly affect the accuracy of the model, so what makes the ideal dataset possible, let’s examine it.
⏰ Reminder: The following points are basically for creating a custom dataset. If your custom dataset is already ready and you’re getting good results, you need to fine-tune the optimizations.
1- Quantity
As the size of the dataset increases, the number of images you reserve for train, validation, and testing will also increase, that’s what we want. The most important point here is to qualitatively increase the number of images in your dataset. One of the things I’ve experienced as well is that a smaller dataset can easily do the job of a large dataset if it’s more qualified!
2- Quality
Choosing the data suitable for the scenarios that the model will encounter in real life will make your dataset more qualified. If you are going to use the model results in a particular environment in real life, you can take samples from that environment so the model will serve your purpose. The quality of the dataset will save on many issues such as time, memory, and cost that your work will spend.
3- Annotation
For any object to be meaningful to our model, it is necessary to tell the model what the given data is. Thus, the computer processes and makes sense of the data, we call this annotation and we do it thanks to the labeling process.
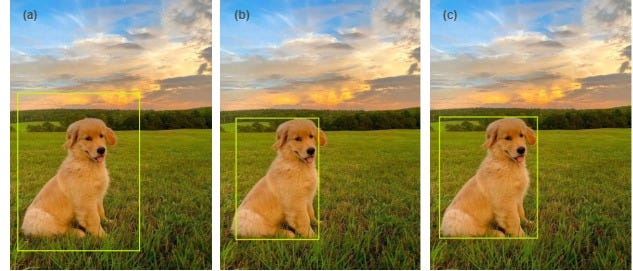
I would like to explain labeling with an example; When we want to detect a dog, we surround the dog in the image with a bounding box, whose edges must touch the outermost pixels of the labeled object. Our label text file contains the coordinates of this bounding box. We annotate our label text files with the images in the dataset, so we make sense of the data by telling our model that the object in the bounding box is a dog. It is extremely important to provide annotation with the most appropriate labeling. To minimize errors, labeling can be done human-led or it is possible to do it quickly and more accurately with various programs. I used Plainsight and I recommend it, it is very practical to use.

(a) Must be as tight as possible (b) Must include all visible parts (c) Correct bounding
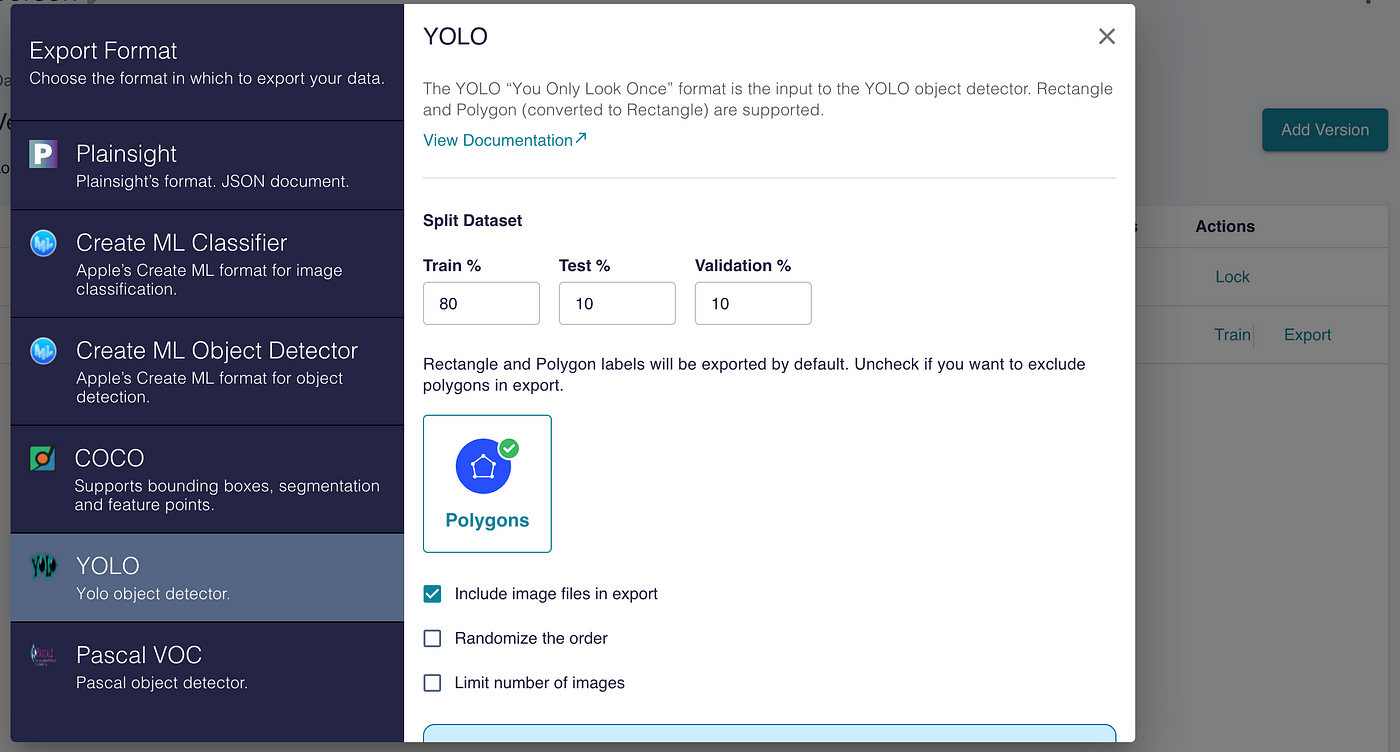
Preferring polygons instead of rectangle bounding boxes will enable us to achieve better results.
If your labels are ready and the labeling tool you use has a model trial feature, you can quickly measure your custom dataset. You should export it in the appropriate format with YOLO so that the file directory will be suitable for use in your model.

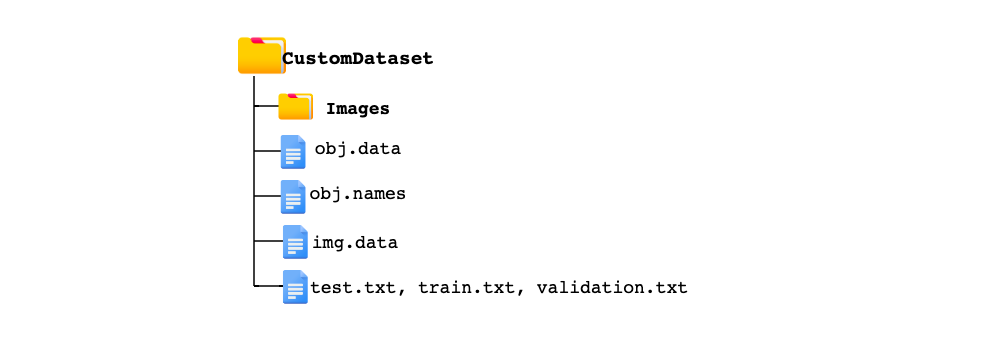
The custom dataset folder directory exported from the tool I used before is as in the image below. All of the images in the dataset are in a folder named img. Images and labels are in the same folder.
So how will the model know which data is train data and which data is reserved for validation? The train.txt, validation.txt, and test.txt files contain paths for each of the separated images.

Usage with Model
Now everything necessary is ready, except for one thing! You need to give the YOLO model the file directories to access the custom dataset.

If you prefer to use Google Colab in your work, you can upload your custom dataset to your Drive.
I mentioned that the train.txt, validation.txt, and test.txt files contain paths for each of the separated images. The YOLO model accesses the custom dataset according to the paths in the data file.

If you prefer transfer learning using one of YOLO’s models, you should write the path of the train, validation, and test images in your coco128.yaml file. If you are going to create your own model, it will be enough to create a YAML file in the same format and add the necessary paths.
Congratulations, you now have your own custom dataset and can train it!🎉
I would be happy to share your experiences with us, please do not hesitate to comment. 👥
Yorumlar
Kullanıcı yorumlarını görüntüleyebilmek için kayıt olmalısınız!